IBM 5170 - Performing SETUP Using a 720K Sized GSETUP Diskette
Requirements
- A 'modern' Internet-connected computer with a 1.44M diskette drive.
- WinImage software installed on your 'modern' computer. Get WinImage from www.winimage.com
- A 720K diskette (preferred) or 1.44M diskette that you are prepared to overwrite.
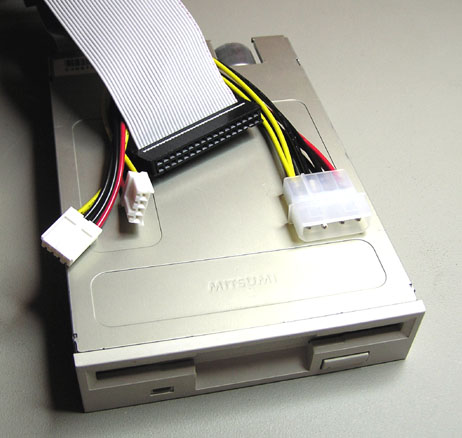
- For the 5170, a 'standard' 34-pin 1.44M diskette drive (not a USB or PS/2 one) and associated 34-pin data cable and power cable. (photo)
Notes
- For the first models of the 5170 (models 068 and 099), this procedure takes advantage of the fact that such models, in a CMOS/RTC cleared state, can read a 720K diskette (but not write to it).
- 'Expansion' memory (don't confuse with 'expanded' memory) is an early IBM term for what later became known as 'extended' memory.
STEP 1: Replace the Battery
The probability is extremely high that the 5170 has lost it's configuration/setup because the internal backup battery is dead.
If the error is 161, you can be very sure that that is the case. Note that simply replacing the battery with new won't remove the 161 error - the error won't disappear until you go complete all 8 steps of this procedure.
I've seen some 5170 motherboards that don't detect dead batteries. They instead go on to display a 162 error. And so don't assume that lack of a 161 error means that the battery is okay.
Measure the battery voltage if you can. If you don't have the capability to measure the battery voltage, assume that the battery is dead.
For battery details, click here
STEP 2: Create GSETUP Diskette
Assumption: Per the 'Requirements' section, WinImage has been installed on your 'modern' computer.
2.1 Obtain a 720K diskette that you are prepared to overwrite. See here for the difference between 720K and 1.44M diskettes.
A 1.44M diskette with its density hole suitably covered may work instead - not a legitimate action, but it should work for the purpose of what we are about to do in the following steps.
2.2 [modern computer] Place the diskette into the 1.44M drive.
2.3 [modern computer] Download file
5170_gsetup_720k.imz (an image file of a 720K sized IBM DOS 3.3 boot diskette) to your hard drive.
2.4 [modern computer] In Windows Explorer, double-click on the downloaded 5170_gsetup_720k.imz file. As a result, WinImage should open, showing the contents of the image file.
2.5 [modern computer] On the WinImage menu bar, select DISK and in the menu shown, verify that the drive selected is your 1.44M one.
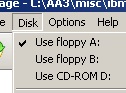
2.6 [modern computer] On the WinImage menu bar, select DISK and then FORMAT AND WRITE DISK. WinImage should start formatting/writing the diskette.
2.7 [modern computer] When WinImage has finished formatting/writing the diskette, close WinImage.
2.8 [modern computer] Remove the diskette.
You now have a 720K sized IBM DOS 3.3 boot diskette for your IBM 5170.
STEP 3: Determine the IBM Hard Drive Type Number
Click here for information on how to determine the IBM hard drive type number.
STEP 4: Fit 1.44M Diskette Drive To 5170
4.1 [5170] Power off the 5170 if it is on.
4.2 [5170] At the hard/floppy controller card, remove the 34-pin cable that originates from the 5.25" floppy drive.
4.3 [5170] In it's place, connect the 34-pin cable that itself is connected to the 1.44M diskette drive.
Ensure that the cable is plugged in the correct way - pin 1 up.

4.4 [5170] Connect power to the 1.44M drive.
STEP 5: Boot From The GSETUP Diskette
5.1 [5170] Insert the GSETUP diskette that you created at step 2 into the 1.44M diskette drive.
5.2 [5170] Power on the 5170.
5.3 [5170] At the (RESUME = "F1" KEY) prompt, press the [F1] key. The 5170 should start to boot from the GSETUP diskette.
STEP 6: Determine Size of Base Memory and Extended Memory
At this point, you should see an A:\> prompt on the 5170's display.
6.1 [5170] Type in MEMSIZE then press the [Enter] key. The MEMSIZE program will run.
6.2 [5170] Note the amount of base memory shown. You'll use the amount in a later step.
6.3 [5170] Note the amount of extended memory shown. You'll use the amount in a later step.
STEP 7: Run GSETUP
At this point, you should see an A:\> prompt on the 5170's display.
7.1 [5170] Type in GSETUP then press the [Enter] key. The GSETUP program will run.
7.2 [5170] At the "Press any key to continue" prompt, press the [Enter] key.
7.3 [5170] Press the [1] key so as to execute the first of the four presented options.
7.4 [5170] Set up the options in the screen, per:
7.4.1 Set the time.
7.4.2 Set the date.
7.4.3 Set 'Floppy Disk A:' to the 'DS/HD 1.2m' option (because the supplied A: drive in 5170s was a 1.2M one).
7.4.4 Set 'Hard Disk 1 (C:)' to the type number determined at step 3.
7.4.5 Set 'Base memory' to the base memory figure determined at step 6.2
7.4.6 Set 'Expansion memory' to the extended memory figure determined at step 6.3
7.4.7 If the optional maths coprocessor chip (80287) is fitted to the motherboard, set 'Maths Coprocessor' to 'Installed'.
GSETUP assumes some things. If you are unable to adjust the expansion memory figure to match what you have,
then power off the 5170, then perform the procedure listed on this link, then restart at STEP 5.
7.5 [5170] Press the [Esc] key.
7.6 [5170] Press the [4] key.
7.7 [5170] Remove the diskette.
7.8 [5170] Press any key to reboot.
Hopefully, your 5170 is now booting from the hard drive.
STEP 8: Restore Original Floppy Drive
8.1 [5170] Power off the 5170.
8.2 [5170] Disconnect the 1.44M diskette drive that was fitted in step 4, then reconnect the 5.25" drive.
FINISH